Thingsup is
Platform as a Service (PaaS)
With Thingsup you can develop Custom Hardware/Software Products and Solutions.
We have Built IoT Solutions for Years
We know what you need.
End-to End IoT Solutions needs serious hardware and software technologies such as Sensor Devices, Communication Modules, Server to Receive Data, Data Processing Engine, Data Storage Engine, Data Analytics Engine and Finally a beautiful Dashboard for Visualization.
Thingsup Has Everything
We provide all the things you will need to build A World Class IoT Solution.
- Hardware Devices
- MQTT IoT Broker
- Rules Engine
- Database Connectivity
- Dashboard Builder
- User Management
- Device Management
Let's Build a Basic IoT Logger Application
in Low Code with Thingsup
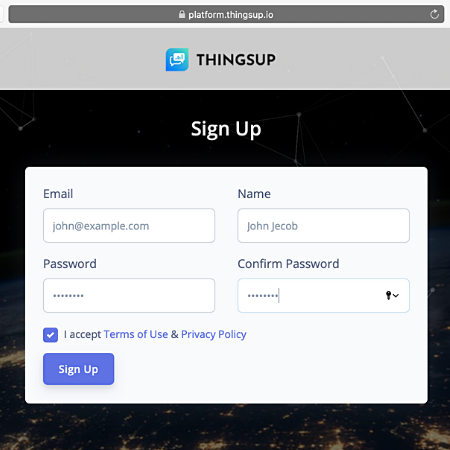
Step 1: Create Account
- Sign up at Thingsup Platform with your email Id.
- You will receive a Verification Email with Confirm Button.
- Press Confirm Button to Verify your account.
- Now, Sign in with your credentials into Thingsup.
- Go to Account from Top right User Menu and fill the in the Address Info.
- Go to Billing Section from same User Menu. You will see available Plans. Select Plan and Pay or Redeem available coupon code. You will see Available Credits in Billing Section.
Step 2: Add Device
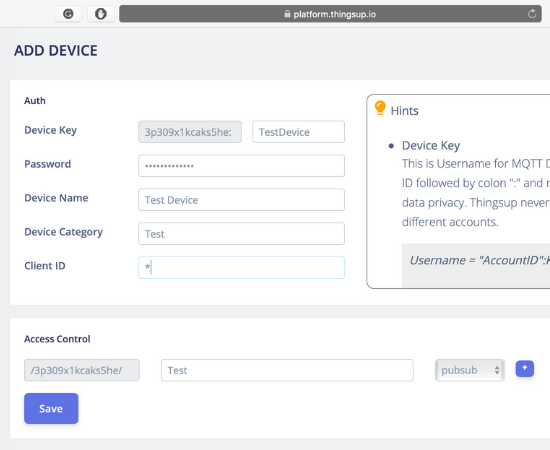
- Go to Add Device from Device Management in Left Navigation Tab.
- Enter DeviceKey of your choice. The AccountID appended with Device Key is your MQTT Username. e.g. 3p309x1kcaks5he:TestDevice1
- Enter Password of your choice. This is your MQTT Password for connection. Write * in Client ID and fill in the other device details.
- In Access Control, Write Test in Topic and select Pub/Sub from Account. This gives your device permission to publish and subscribe on Topic. e.g. /3p309x1kcaks5he/Test.
Step 3: Send Data
- Go to Device Management in Left Navigation Tab.
- Enable Device Added in Step 2.
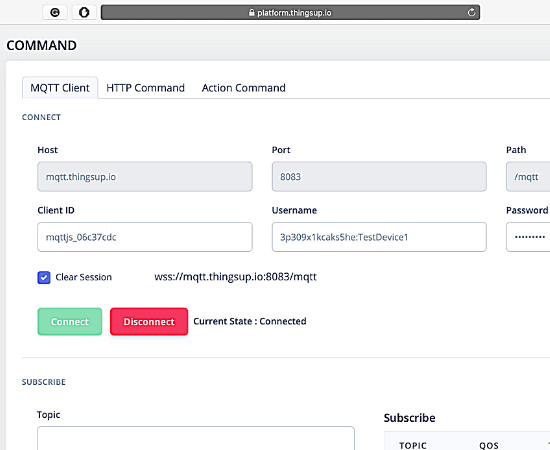
- Go to Command Tab and Select MQTT Client.
- Enter all the details created from Step 2 and hit Connect, You will be connected to Thingsup MQTT Service.
- Now go to Publish Section and fill in the Topic created earlier in Step 2 with payload as JSON – {“Temp”:23}, hit Publish button.
- Great, You have just sent Message with Thingsup.
Step 4: visualise Live Data
- If you subscribe to same Topic in MQTT Client and publish the message as per Step 3, you will be able to see Live sent Data in the Messages Received Tab.
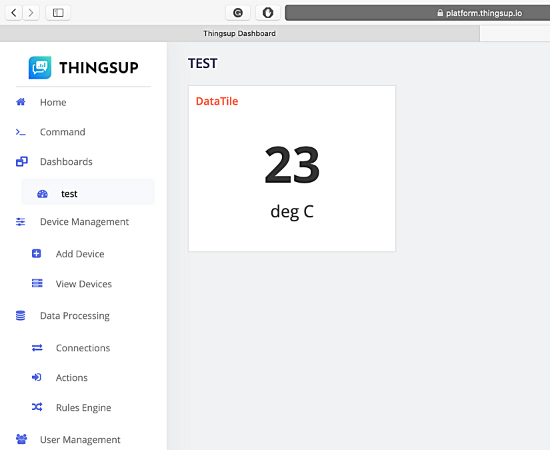
- Go to Dashboards Tab and Create Dashboard with some name. Press Edit button of Just Created Dashboard.
- Now You will See Dashboard Building Tool. Press ‘+’ Button to see Widgets. Select Data Tile Widget and Press Add Widget.
- Press ⚙ Icon on Data Tile Widget to Customise, Select Data Source Live and Enter Topic Created in Step 2. Save to Config and Return to Dashboard.
- Great, Now Just go to Another Window or Tab and Click Your Dashboard Name Tab under Dashboard section. You’re Dashboard is Live, repeat Step 3 in older Browser Tab/Window. You will see Live Data in Dashboard just created by you.
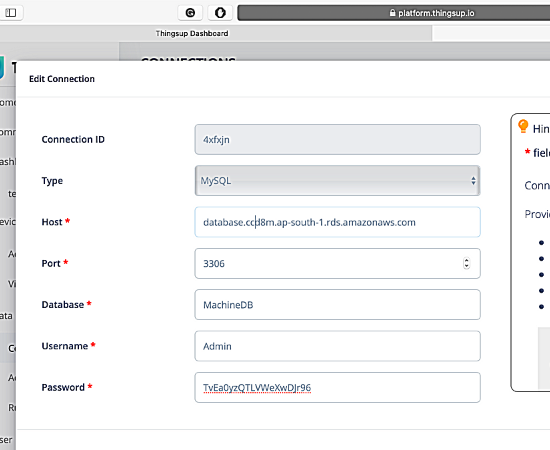
Step 5: Add DB Connection
- Go to Connections Tab.
- Add Connection details of as per your choice. AWS in case of DynamoDB, or MySQL with provided Hints.
- Make sure your Database is publicly accessible with authentications.
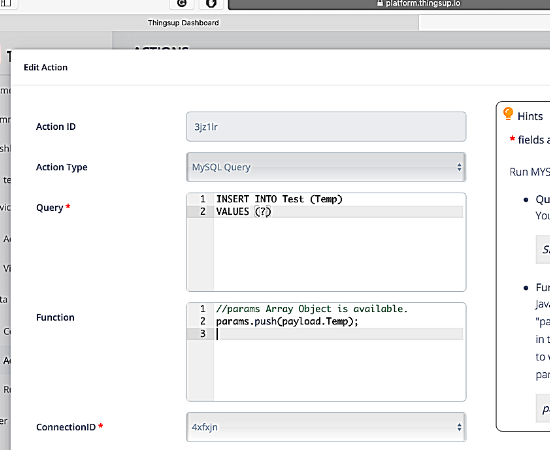
Step 6: Create Logger Action
- Go to Actions Tab.
- Create Action for Database selected in Step 5 or In case of DynamoDB select PutItem action
- Fill the details as per Hints available with respective actions.
- Note the Action ID in the form and hit Save.
Step 7: Set Rule for Action
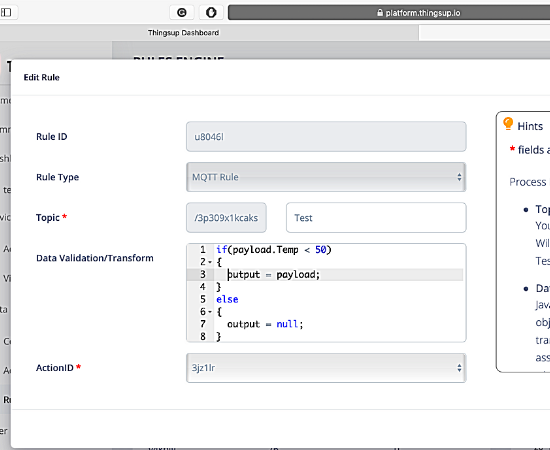
- Go to Rules Tab.
- Create a MQTT Rule with Topic from Step 2 and Action from Step 6.
- In Rule, you can write own custom Data Validation/Transform function which will be executed when message is published on provided topic.
- Hit Save and All the messages sent on topic will be logged by running your Database Action created in previous step.


